
Salads
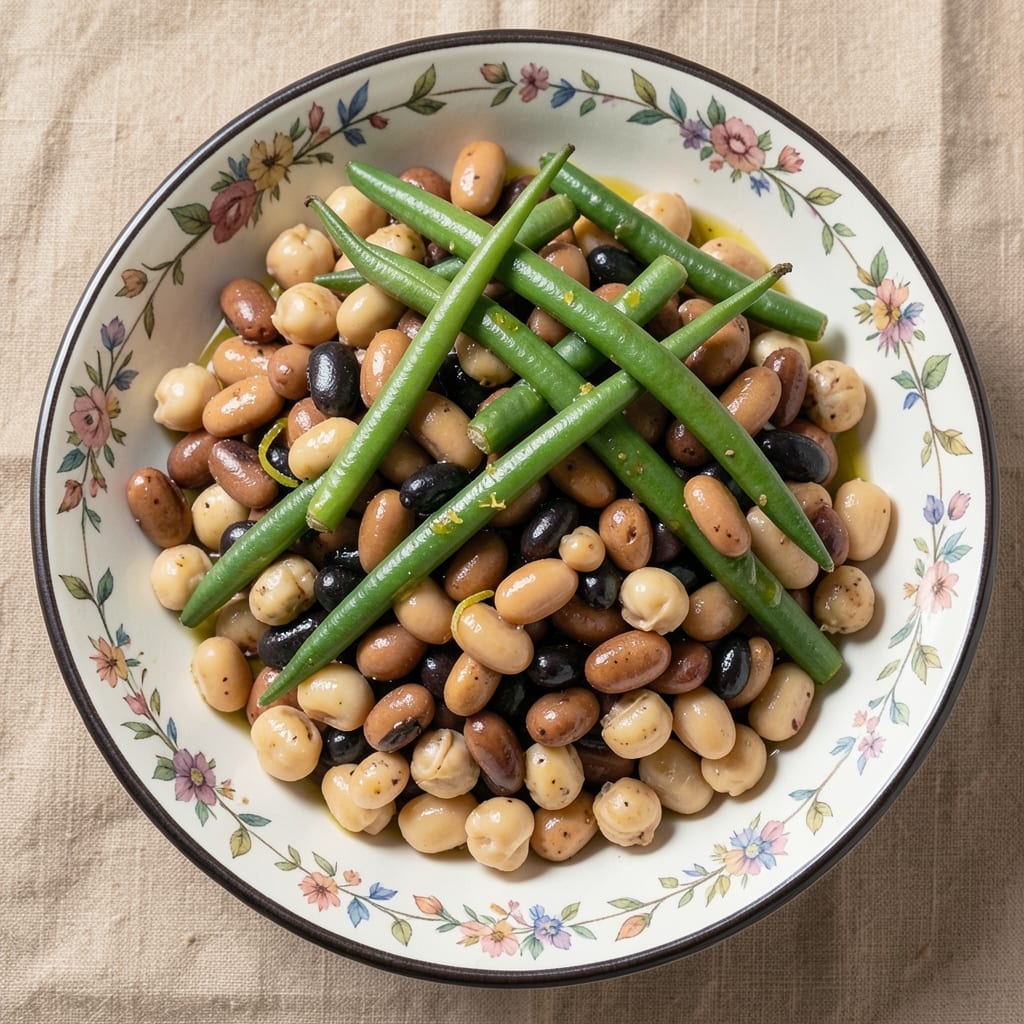
This healthy 6-bean salad recipe delivers protein-packed crunch without relying on mayo, making it perfect for meal prep or a satisfying side dish. The combination of six different beans—cannellini, kidney, black, pinto, chickpeas, and green beans—creates a nutrient-dense base that’s rich in fiber and plant-based protein. The key to this recipe is a bright, herb-infused vinaigrette that keeps the beans vibrant and flavorful while enhancing their natural textures.
The beauty of this salad lies in its versatility—it works as a standalone meal or pairs beautifully with grilled chicken, fish, or quinoa. Unlike traditional bean salads, this version avoids heavy dressings, keeping it light yet satisfying. The beans are tossed with fresh herbs, diced vegetables, and a touch of acidity from red wine vinegar, ensuring every bite is bold and fresh. Prep it ahead for a foolproof lunch or dinner solution.
What sets this recipe apart is its balanced nutrition—each serving packs 15 grams of protein and 10 grams of fiber, making it ideal for vegetarians, weight management, or anyone looking to boost their plant-based intake. The beans stay crisp and tender, while the dressing adds a zesty kick that keeps the flavors vibrant. This isn’t just another bean salad; it’s a nutritious powerhouse that’s as delicious as it is healthy.
Perfect for meal preppers, health-conscious eaters, or anyone craving a no-fuss, high-protein dish, this salad comes together in under 20 minutes with minimal effort. Store it in the fridge for up to 5 days, making it an easy solution for busy weeks. Whether you’re meal planning or simply looking for a nutrient-rich side, this recipe delivers restaurant-quality results at home.
Ingredients for 6 bean salad recipe healthy
Six vibrant beans meet fresh herbs and bright vinaigrette for a nutrient-dense, protein-rich salad.
| Ingredient | Amount | Notes |
|---|---|---|
| Cannellini Beans 🌱 | 1 ½ cups | Drained and rinsed, medium firm |
| Kidney Beans 🌱 | 1 cup | Drained and rinsed, firm texture |
| Black Beans 🌱 | 1 cup | Drained and rinsed, no liquid |
| Pinto Beans 🌱 | 1 cup | Drained and rinsed, speckled variety |
| Chickpeas 🌱 | 1 cup | Drained and rinsed, firm texture |
| Green Beans 🌱 | 1 cup | Fresh or thawed, trimmed |
| Red Bell Pepper 🍅 | 1 whole | Diced, medium size |
| Red Onion 🧅 | ½ whole | Finely diced, white or red |
| Fresh Parsley 🌿 | ¼ cup | Chopped, flat-leaf preferred |
| Fresh Dill 🌿 | ¼ cup | Chopped, tender stems |
| Extra-Virgin Olive Oil 🫒 | ⅓ cup | High quality, fruity |
| Red Wine Vinegar 🍷 | ¼ cup | Dry, aged variety |
| Dijon Mustard 🍯 | 1 tbsp | Mild or medium heat |
| Honey 🍯 | 1 tbsp | Raw or pure |
| Diamond Crystal Kosher Salt 🧂 | ½ tsp | Fine grain preferred |
| Freshly Ground Black Pepper 🌶️ | ¼ tsp | Coarse grind |
The beans form the heart of this dish, so quality matters. Trader Joe's or Whole Foods carry excellent canned varieties—look for low-sodium options to control flavor balance. For the green beans, fresh is ideal, but thawed frozen works perfectly if you're short on time. The herbs should be vibrant and fresh; parsley and dill add brightness that complements the earthy beans. If using dried beans, soak them overnight for optimal texture—this salad deserves the best base possible. For a shortcut, pre-cooked canned beans save time without sacrificing nutrition.
No cannellini beans? Great Northern beans work beautifully as a substitute. The bell pepper can be swapped for red onion only if you prefer sharper flavor, though the pepper adds natural sweetness. Fresh herbs wilt quickly, so dried parsley or dill at one-third the amount is a good alternative. The vinaigrette balance is critical—adjust honey to taste if you prefer less sweetness. For extra protein, add 1 cup cooked quinoa or 1/2 cup crumbled feta (omit if vegan). The dressing should coat the beans lightly—toss just before serving to maintain crispness.
Store the beans and vegetables separately in airtight containers for up to 3 days in the fridge. The vinaigrette keeps for 5 days when refrigerated, but combine everything within 24 hours for best texture. For meal prep, portion into individual containers—beans stay crisp for 4 days this way. If you're making this ahead, hold off on adding the dressing until serving to prevent sogginess. The flavors actually improve overnight, making it perfect for lunches throughout the week.
Why You'll Love This Recipe
- No-Cook Magic: I swear by this—just toss drained beans (cannellinis, kidney, black, pinto, chickpeas) with olive oil, lemon juice, and salt. No chopping, no fuss, and the flavors meld overnight in the fridge.
- Earthy Umami Bomb: That mix of beans? Kidney’s smoky depth, cannellinis’ buttery texture, and chickpeas’ crunch—it’s like a flavor party where every bean brings something special. Honestly, the first bite makes me pause.
- Lunchbox Legend: Between us, this salad holds up perfectly for days. Pack it for work, toss it in wraps, or serve it cold at picnics—it’s my go-to when I need something hearty but hands-off.
- Pantry Goldmine: Five beans for under $5 at my grocery store. No specialty ingredients, no waste—just pure, protein-packed goodness that stretches across meals without breaking the bank. (Yes, even on a Tuesday night.)
Step-by-step instructions for creating a protein-packed 6 bean salad
This method delivers vibrant texture and balanced flavor without heavy dressings.
Prepare the Bean Foundation
In a large mixing bowl, combine the 1.5 cups Cannellini Beans, 1 cup Kidney Beans, 1 cup Black Beans, 1 cup Pinto Beans, and 1 cup Chickpeas. These varieties create a satisfying texture contrast—creamy cannellini, hearty kidney, tender black, speckled pinto, and firm chickpeas. Use your hands to gently break up any large bean clumps while preserving their individual shapes.
Add the 1 cup Green Beans and 1 whole Red Bell Pepper (pre-diced). The green beans contribute a crisp bite, while the bell pepper adds natural sweetness and color. If using fresh green beans, trim the ends first—this prevents them from looking unruly in the final salad. The bell pepper should be diced into ¼-inch pieces for even distribution throughout the salad.
Build the Flavor Base
In a small bowl, whisk together the 0.33 cup Extra-Virgin Olive Oil, 0.25 cup Red Wine Vinegar, 1 tbsp Dijon Mustard, and 1 tbsp Honey. This dressing forms the foundation of the salad's flavor profile—bright acidity from the vinegar, depth from Dijon, natural sweetness from honey, and richness from the olive oil. Whisk vigorously for 30 seconds until fully emulsified and smooth.
Season the dressing with 0.5 tsp Diamond Crystal Kosher Salt and 0.25 tsp Freshly Ground Black Pepper. Taste and adjust—you want a balance where the acidity is noticeable but not overpowering, and the sweetness enhances rather than dominates. The Dijon mustard adds subtle complexity that elevates the simple ingredients.
Combine and Season
Pour the dressing over the bean mixture and gently toss with a large spoon or your hands. Work in batches if needed to ensure even coating. The beans should glisten slightly from the olive oil, indicating proper distribution. Let the salad sit for 10 minutes at room temperature—this allows the flavors to meld and the dressing to penetrate the beans.
After resting, add the 0.5 whole Red Onion (finely diced) and the 0.25 cup Fresh Parsley and 0.25 cup Fresh Dill. The onion adds sharpness that cuts through the richness, while the herbs provide freshness and vibrant color. Toss again gently to distribute the herbs evenly. The parsley should be finely chopped to avoid large stems, and the dill should be cut into small pieces for even distribution.
Final Adjustments and Serving
Taste the salad and make any final adjustments. If it needs more brightness, add a splash of additional Red Wine Vinegar. For extra richness, drizzle with more Extra-Virgin Olive Oil. The salad should have a harmonious balance of textures—creamy beans, crisp green beans, tender bell pepper, and crunchy onion—with each bite offering a mix of these elements.
Serve immediately for the best texture, or refrigerate for up to 4 hours before serving. The flavors will continue to develop in the fridge, becoming more cohesive. This salad makes an excellent protein-rich side dish for grilled meats, a light lunch option, or a vibrant addition to picnic spreads. The absence of mayo makes it heart-healthy while still delivering satisfying texture and flavor.
Pro Tips For Making 6 Bean Salad Recipe Healthy
- Rinse the Beans Thoroughly: Canned beans have that weird starchy coating that turns your salad into a mushy mess. Drain them, then give each can a quick rinse under cold water—especially the kidney and black beans, which hold onto gunk like it’s their job. I learned this the hard way after a batch turned into a sad, gluey blob.
- Mix Bean Sizes Strategically: Big beans (cannellini, pinto) and small beans (black, chickpeas) need balance—don’t just dump them all in. Toss the larger beans first, then fold in the smaller ones last so they distribute evenly. Your salad will look intentional, not like you grabbed whatever was in the pantry.
- Dress Just Before Serving: Acidity (vinegar, lemon) and oil separate over time, turning your dressing into a sad, split-phase science experiment. Keep the dressing in a separate container and toss it in right before eating—yes, even if you’re serving it buffet-style. Trust me, your guests will notice the difference.
- Use Cold Beans, Not Warm: Warm beans release starch like crazy, making your salad greasy and heavy. Drain them straight from the can into an ice bath for 5 minutes—it’s a tiny effort that keeps the texture light and crisp. I skip this sometimes, and the salad always feels heavier afterward.
Make-ahead tips for this recipe
Prep Ahead Strategy
Start by storing the beans and vegetables separately in airtight containers for up to 3 days in the fridge. This preserves their texture—beans stay crisp while veggies retain crunch. The vinaigrette keeps for 5 days when refrigerated, but combine everything within 24 hours of serving for optimal freshness. I always prep the dressing first since it’s the most stable component. 💫
Portioning for Meal Prep
Divide the salad into individual meal prep containers with the beans and veggies in one compartment. Store the dressing separately and toss together right before eating. This method keeps the beans crisp for 4 days—no soggy textures! For extra convenience, portion the herbs in small bags and add them fresh when assembling. I use glass containers because they’re microwave-safe and don’t absorb odors.
Freezing for Long-Term Storage
While not ideal for texture, you can freeze the beans and veggies (without dressing) for up to 3 months. Thaw overnight in the fridge, then toss with fresh herbs and dressing. The green beans may soften slightly, but the overall flavor remains intact. I recommend freezing only the bean mix—skip the green beans if you want to maintain crispness. Label containers with dates to track freshness. ❄️
Dressing Prep Shortcut
Make a double batch of dressing and store it in a small jar in the fridge. The extra portion works perfectly for salads, roasted veggies, or even drizzled over grilled chicken. I keep mine in a mason jar with a tight lid—it lasts 7 days this way. For a quick assembly, just toss the prepped beans with the dressing and herbs right before serving. This saves 10 minutes of prep time each day!
Herb Substitutions for Longevity
Fresh herbs wilt quickly, so store them separately in a small container with a damp paper towel. For long-term storage, swap them for dried parsley or dill (use one-third the amount). I also keep a small bag of frozen herbs in my freezer for emergencies—they work well when thawed and drained. The flavor won’t be as vibrant, but it’s a great backup for busy weeks. 🌿
Reheating for Best Results
If you need to reheat, transfer the salad to a microwave-safe bowl and heat for 1-2 minutes on 50% power. Stir halfway to ensure even warming. For stovetop reheating, place the salad in a skillet over low heat for 3-4 minutes, stirring occasionally. Avoid high heat—it can make the beans mushy. I prefer reheating just the beans separately and tossing with fresh dressing and herbs for the best texture. 🔥
Nutrition facts
Frequently asked questions
Can I use dried beans instead of canned for this recipe?
Yes, but you'll need to soak them overnight first! Dried beans absorb more water and take 1-2 hours of simmering to become tender. For the best texture, use 3 cups dried beans total (about 1.5 cups each of cannellini, kidney, black, pinto, and chickpeas). Rinse well before cooking to remove any debris. The green beans can still be fresh or frozen.
How can I make this salad even more protein-rich?
Add 1 cup cooked quinoa (about 12 grams protein) or ½ cup crumbled feta (about 6 grams protein) for extra protein. For a vegan option, stir in ½ cup toasted pumpkin seeds (about 5 grams protein). The original recipe already packs 15 grams protein per serving, so these additions will boost it to 20-25 grams.
Why does my bean salad get soggy after a few days?
Beans absorb moisture over time, especially from dressings. To prevent sogginess, store the beans and veggies separately in airtight containers, then toss with dressing just before eating. If using mayo-based dressings (though this recipe avoids them), they accelerate moisture absorption. For longer storage, keep the dressing in a separate jar and combine only when ready to serve.
What’s the best way to store leftovers?
Store in glass containers with tight lids for up to 5 days. Keep the beans and veggies in one container, and the dressing in a separate small container. When ready to eat, toss everything together. For best texture, avoid storing the fully dressed salad longer than 24 hours. If freezing, only freeze the beans and veggies (without dressing) for up to 3 months.
Can I make this salad ahead for a potluck?
Prep all ingredients separately and assemble just before serving. Store the beans, veggies, and dressing in separate containers, then let guests toss their own portions. This keeps the salad crisp and fresh. If you need to transport it, pack the dressing in a small jar and keep it chilled until ready to mix—this prevents soggy textures during transit.