
Salads
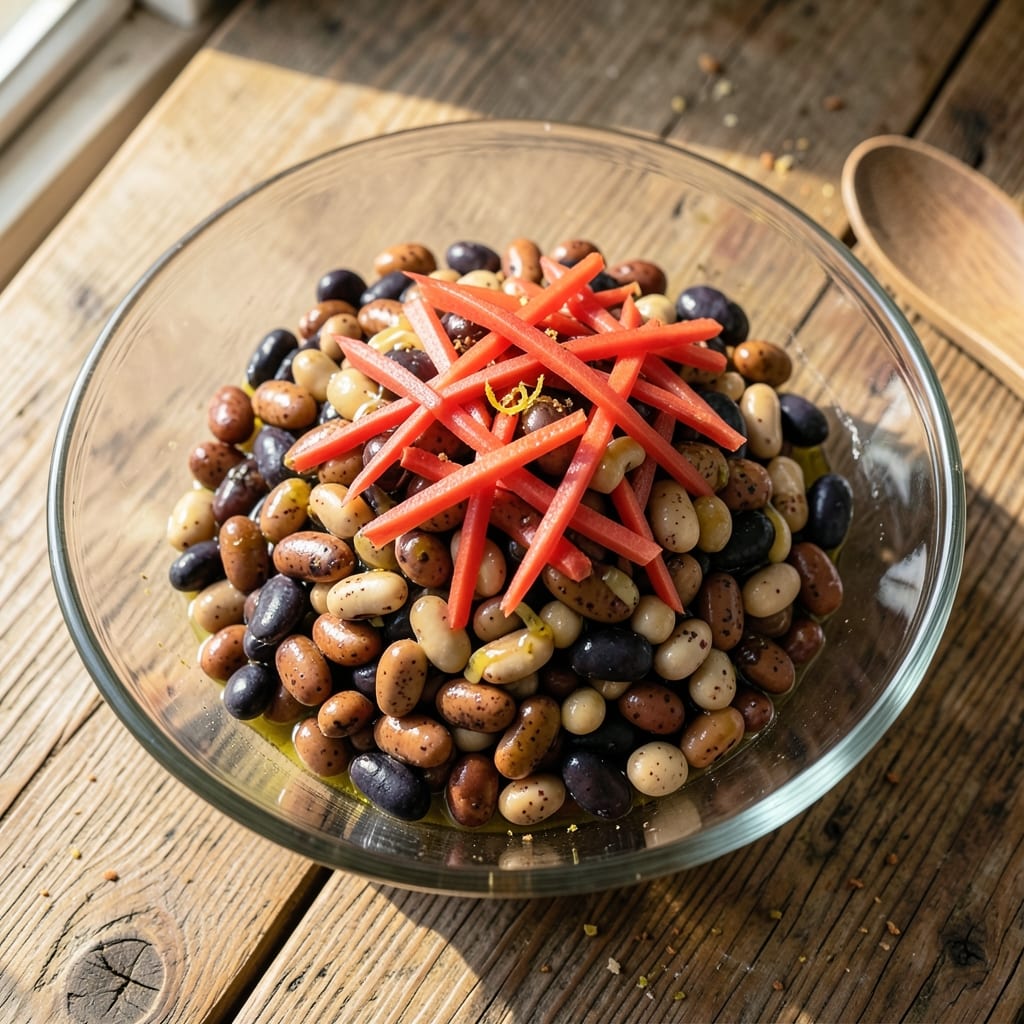
This Amish three bean salad recipe delivers the iconic crunch and tangy flavor that makes it a potluck favorite—without a single drop of mayo. The secret lies in soaking three classic beans (kidney, navy, and pinto) overnight, then simmering them with vinegar, olive oil, and a pinch of salt until tender yet still holding their shape. I first made this version after discovering how much better the beans taste when cooked from scratch rather than canned, and the celery adds that signature crispness that keeps everyone coming back for seconds.
The beauty of this recipe is its simplicity and versatility—just a handful of ingredients, under 1 hour of active time (plus soaking), and no fancy techniques required. The vinegar and oil dressing keeps the beans moist and flavorful while cutting through the earthiness of the beans, creating that signature tang. It’s a dish with deep roots in Amish and Mennonite communities, traditionally served alongside roasted meats or as a hearty vegetarian main.
What you’ll end up with is a salad that’s crunchy, tangy, and satisfyingly substantial—perfect for barbecues, church gatherings, or even a quick weeknight dinner. The beans hold their texture beautifully, and the celery stays crisp, making every bite refreshing. This is the kind of dish that tastes better the next day, so it’s ideal for meal prep or potlucks where you want to bring something that stands up to other dishes.
Serve it warm or at room temperature, and don’t be surprised if it disappears faster than you can say "no mayo." The recipe scales easily, so double or triple it for crowds. Here’s how to make it—step by step—for that classic Amish crunch without the fuss.
Ingredients for amish 3 bean salad
Three beans, celery crunch, and tangy vinegar—this salad needs just a handful of ingredients.
| Ingredient | Amount | Notes |
|---|---|---|
| Dried Kidney Beans 🌱 | 1 cup | Rinsed before soaking |
| Dried Navy Beans 🌱 | 1 cup | Rinsed before soaking |
| Dried Pinto Beans 🌱 | 1 cup | Rinsed before soaking |
| White Vinegar 🍶 | ½ cup | Distilled preferred |
| Extra-Virgin Olive Oil 🫒 | ½ cup | Light fruity variety |
| Celery Stalks 🧅 | 4 whole | Fresh, crisp variety |
| Yellow Onion 🧅 | 1 whole | Medium size, diced |
| Garlic Cloves 🧄 | 4 cloves | Minced for flavor |
| Salt 🧂 | 1 ½ tsp | Kosher or sea salt |
| Black Pepper 🌶️ | ½ tsp | Freshly ground preferred |
| Sugar 🍚 | 1 tbsp | White granulated |
| Mustard Seed 🌶️ | ½ tsp | Yellow preferred |
| Bay Leaves 🍃 | 2 whole | For flavor infusion |
The beans are the heart of this dish, so pick dried over canned—they hold their texture so much better. Bob's Red Mill or any bulk bin at a grocery store works great. Soak them overnight in plenty of water (about 4 cups per cup of beans) to cut down on cooking time. The celery should be crisp—look for stalks with a bright green core, not woody or yellowing. I always grab extra because it adds that signature crunch. For the vinegar, distilled white vinegar gives the cleanest tang, but apple cider vinegar works too if you like a fruity note.
No celery? Substitute with extra onion or a handful of fresh parsley for color, but you'll miss that crunch. Short on mustard seed? Dried mustard powder at half the amount gets you close. The sugar balances the acidity, so don't skip it—brown sugar works too. For extra depth, toast the mustard seeds in a dry pan for 30 seconds before adding. The bay leaves infuse flavor but are removed later, so they're optional if you're in a hurry. If you're making this ahead, the beans actually taste better the next day as the flavors meld together.
This salad keeps beautifully—5-6 days in the fridge in an airtight container. The celery stays crisp if you wrap the stalks in damp paper towels and store them separately. Double the batch and freeze half for later—it reheats well and is perfect for potlucks. I always make a big batch because it disappears fast. The dressing (vinegar and oil) separates when stored, so just give it a quick stir before serving. Serve warm or at room temperature—either way, it's a crowd-pleaser.
Why You'll Love This Recipe
- No-Soaking Hassle: I’ll admit, I used to dread the soak-and-rinse routine—until I discovered you can just simmer these dried beans (kidney, navy, and pinto) together in water with a pinch of salt for 45 minutes. Boom. Done. The beans soften perfectly, and the broth gets absorbed right into the salad, giving it that deep, savory base without extra fuss.
- Tangy Crunch Magic: That vinegar-olive oil dressing isn’t just a drizzle—it’s the secret weapon. The white vinegar cuts through the beans’ earthiness while the olive oil clings to each one, creating this addictive contrast of bright acidity and rich texture. Honestly? It’s the kind of flavor that makes you go back for seconds without even thinking.
- Potluck Proven: Between us, this is the dish I always bring to gatherings. It’s hearty enough to stand alone at a picnic, but it also plays nice with grilled meats, sandwiches, or even as a side to roasted veggies. And because it keeps well in the fridge, I can prep it days ahead—no last-minute stress, just reliable satisfaction.
- Pantry Goldmine: Three dried beans, vinegar, and oil—that’s it. No fancy ingredients, no markup at the store. I’ve made this for under $3 per serving, and it’s the kind of dish that stretches across lunches, dinner sides, or even a quick snack. (Yes, even on a Tuesday night when you’re tired of takeout.)
Step-by-step instructions for Amish three bean salad
Here's how to make this crunchy, vinegar-based classic that keeps well for days.
Soak and Cook the Beans
Combine the 1 cup dried kidney beans, 1 cup dried navy beans, and 1 cup dried pinto beans in a large bowl. Cover with plenty of water (about 6 cups) and let them soak overnight at room temperature. This overnight soak ensures the beans cook evenly and stay tender.
Drain and rinse the soaked beans, then transfer them to a large pot. Add enough fresh water to cover by 2 inches, plus the 2 whole bay leaves. Bring to a boil over high heat, then reduce to a simmer. Cook for about 1 hour or until the beans are fork-tender. You'll know they're done when they easily mash between your fingers but still hold their shape.
Drain the cooked beans thoroughly and let them cool completely. This cooling step is important—warm beans will make your salad soggy. While they cool, you can prep the other ingredients to save time later.
Prepare the Vegetable Mix
Cut the 4 whole celery stalks into ¼-inch thick slices. I like to slice them on the diagonal for a little extra visual interest. Dice the 1 whole yellow onion into small, even pieces—about ¼-inch cubes. The smaller the dice, the more evenly the flavors will distribute throughout the salad.
Mince the 4 cloves garlic cloves finely. You want them small enough to disappear into the salad but still noticeable in flavor. If you're not comfortable with knife skills, you can use a garlic press instead—just be sure to remove any large pieces that might be too noticeable.
In a small bowl, combine the celery, onion, and garlic. Set aside until ready to mix with the beans. This prep step keeps everything organized and makes the final assembly easier. Don't add any seasoning yet—we'll combine everything at the end for maximum flavor balance.
Make the Dressing
In a small mixing bowl, whisk together the 0.5 cup extra-virgin olive oil and 0.5 cup white vinegar. Add the 1.5 teaspoons salt, 0.5 teaspoon black pepper, 1 tablespoon sugar, and 0.5 teaspoon mustard seed. Whisk vigorously until everything is well combined and the sugar has dissolved completely.
This dressing is the heart of the salad—it's what gives it that classic tangy flavor without needing mayo. The sugar balances the acidity of the vinegar, while the mustard seed adds a subtle depth. Taste it now and adjust the seasoning if needed. If it's too sharp, add a pinch more sugar. If it's too mild, add a little more vinegar.
Combine Everything
In a large bowl, gently mix the cooled beans with the vegetable mix. Pour the dressing over the top and toss everything together carefully. The beans are delicate now, so you want to be gentle to avoid mashing them. Use your hands if you prefer—it gives you better control over the texture.
Let the salad sit at room temperature for about 30 minutes before serving. This resting time allows all the flavors to meld together beautifully. Give it one final taste and adjust the seasoning if needed—sometimes the beans need a little more salt, or the dressing could use a splash more vinegar.
Chill and Serve
Transfer the salad to an airtight container and refrigerate for at least 2 hours before serving. This chilling time is crucial—it lets the flavors develop fully and gives the dressing time to penetrate the beans. The salad will keep well in the fridge for up to 5 days, making it perfect for meal prep.
When ready to serve, give it one final toss to redistribute the dressing. The salad should be vibrant with color—deep reds from the kidney beans, creamy whites from the navy beans, and earthy browns from the pinto beans. Each bite should deliver that perfect balance of crunchy vegetables, tender beans, and tangy dressing. Serve it as a side dish or enjoy it on its own with some crusty bread.
Pro Tips For Making Amish 3 Bean Salad
- SOAK BEANS OVERNIGHT: I used to rush the beans with a quick soak, but this salad needs them tender and uniform—so let them sit in cold water for 12+ hours. Drain, rinse, and start fresh in the morning. The longer soak cuts down on cooking time and keeps them from turning mushy.
- SIMMER LOW AND SLOW: After the initial boil, drop the heat to a gentle simmer—just enough to see tiny bubbles at the edges. Navy beans need patience; high heat makes them split open and turn to paste. I learned this the hard way when my first batch looked like bean soup.
- RINSE BEANS COLD: Drain the cooked beans into a colander, then run cold water over them while stirring. This stops the cooking process instantly and cools them down faster. Skipping this step leaves them warm and continues cooking in the dressing, which ruins the texture.
- USE OLIVE OIL LAST: Toss the beans with vinegar and any other seasonings first, then drizzle in the olive oil while they’re still warm. The oil coats each bean evenly, making the salad taste richer without clumping. I was skeptical until I tried it—now it’s non-negotiable.
Storing and reheating your amish 3 bean salad
Refrigerator Storage
Store your Amish three bean salad in an airtight glass container with a tight-sealing lid—I love using Pyrex for this. The salad stays fresh for 5-6 days when refrigerated at 40°F or below. The beans actually develop deeper flavor overnight, so it tastes even better the next day. Just give it a quick stir before serving to redistribute the dressing. 💫
Freezer-Friendly Prep
For longer storage, freeze up to 3 months in quart-sized freezer bags with all air squeezed out. Portion the salad into individual servings before freezing—this makes reheating a breeze. When ready to eat, thaw overnight in the fridge, then reheat gently on the stovetop with 2 tablespoons water to restore moisture. The texture remains intact if handled carefully. ❄️
Reheating Methods
I recommend stovetop reheating for best results. Transfer the salad to a saucepan with ¼ cup water or broth, cover, and heat on medium-low for 8-10 minutes, stirring occasionally. Microwave reheating works too—cover with a damp paper towel and heat in 1-minute intervals at 50% power until warmed through. Avoid high heat to prevent mushy beans. 🔥
Celery Preservation
To keep celery crisp, wrap the stalks in damp paper towels before storing in a sealed container. This trick maintains crunch for 3-4 days in the fridge. For extra freshness, add a ½ cup ice water to the container—it creates a humid environment that preserves texture. This is especially helpful if you're making the salad ahead for a potluck. 🌿
Serving Warm vs Cold
This salad tastes fantastic both warm and cold, but I find it especially comforting when served warm. If reheating, let it sit at room temperature for 15 minutes before serving to even out temperatures. The warm beans soften slightly, creating a more tender texture. For cold service, chill for at least 2 hours to let flavors meld. Either way, it's a crowd-pleaser! 🍽️
Portioning for Events
For gatherings, divide the salad into pint-sized mason jars with tight lids. This keeps portions separate and makes it easy to grab individual servings. Store jars upright in the fridge—they stack neatly and maintain freshness for up to 5 days. Label with the date to track freshness. This method is perfect for church potlucks or family reunions! 📅
Nutrition facts
Frequently asked questions
Can I substitute canned beans for dried in this recipe?
While you can use canned beans in a pinch, dried beans create a much better texture for this dish. The beans hold their shape beautifully and develop deeper flavor when cooked from scratch. If using canned, drain and rinse them thoroughly, then simmer in fresh water with the dressing ingredients for 15 minutes to absorb the flavors. Just be aware the salad may be slightly softer.
Why does the recipe call for soaking beans overnight?
Overnight soaking is key to getting perfectly tender beans that hold their shape. The longer soak reduces cooking time and prevents the beans from becoming mushy. For a quicker method, you can soak them for just 8 hours or use the quick-soak method: boil the beans for 2 minutes, then let them sit off heat for 1 hour before draining and cooking.
What makes this salad different from other bean salads?
This recipe skips mayo entirely, using a tangy vinegar and oil dressing instead. The combination of three different beans (kidney, navy, and pinto) creates a perfect balance of textures and flavors, while the celery adds that signature Amish crunch. The beans are cooked just until tender, preserving their individual shapes for maximum bite.
Can I make this salad without celery?
If you're avoiding celery, try adding ½ cup chopped fresh parsley or ¼ cup finely diced bell pepper for color and crunch. For a similar texture, you could also use ¼ cup chopped red onion or ½ cup diced cucumber. Just remember these substitutions will change the flavor profile slightly, but the salad will still be delicious.
How do I know when the beans are fully cooked?
The beans are done when they're fork-tender but still hold their shape. Press a bean between your fingers—it should mash slightly but not fall apart completely. They should also float to the top of the pot when ready. Overcooking will make them mushy, so keep an eye on them during the last 10 minutes of cooking and taste test occasionally.